Now Reading: How To Install Lightroom Presets
- 01
How To Install Lightroom Presets
How To Install Lightroom Presets

Bloggers are the new media and influence marketing has been growing over the last several years. Success in blogging depends on many factors such as concept, content strategy, engagement, and promotion. Nevertheless, bloggers caring about the aesthetic of the Instagram feed proved to get more attention and become more popular. Using Lightroom presets is the best way to create an attractive Instagram feed and save your time for photo editing. And right after you download your favorite presets read this article to start using them on mobile.
So, here is the detailed guide on how to install presets in Lightroom:
1. Open the Lightroom App
Download lightroom for Android >>
2. Create a folder for your Lightroom presets
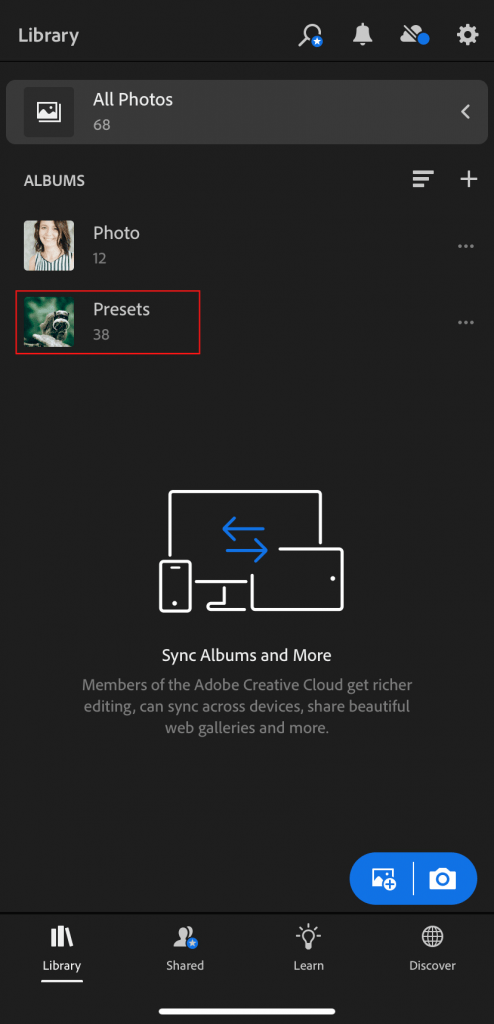
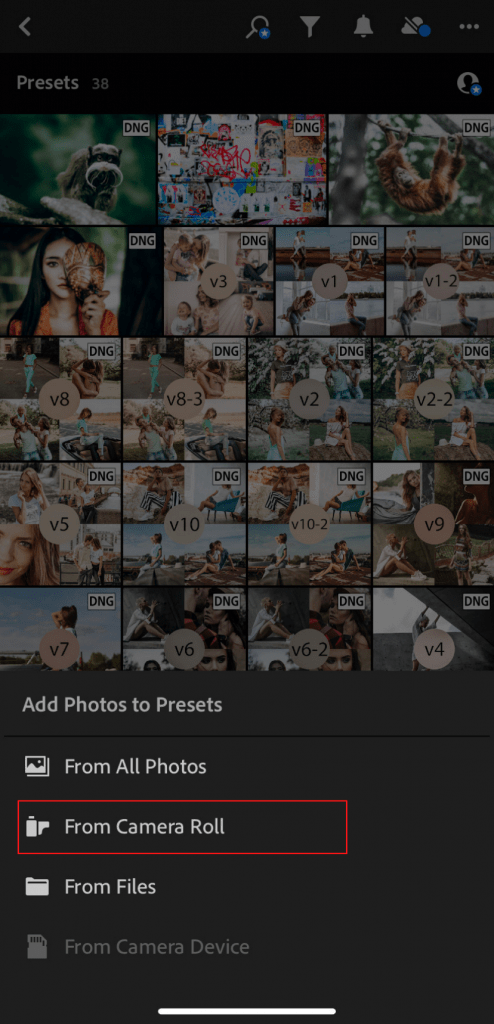
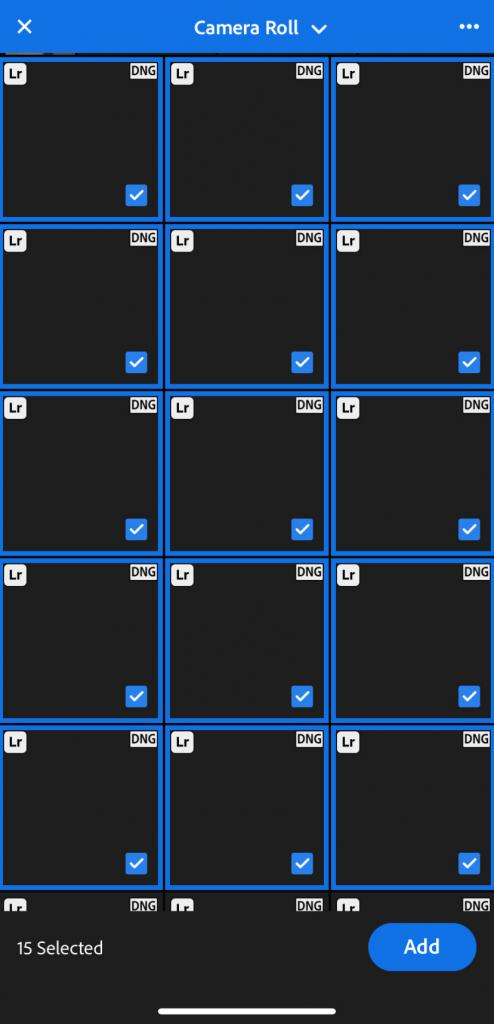
3. Add preset files (DNG) from your mobile device
Visually presets don’t look like pictures but don’t worry. Just add them to your Lightroom app.
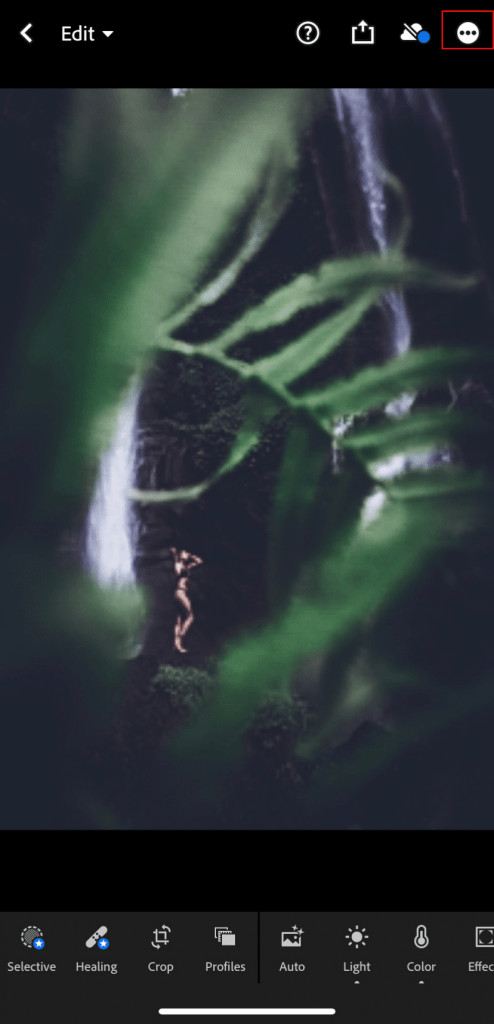
4. Select the preset (photo) you would like to use and click the three dots (…) in the top right corner of the preset photo
Press ‘Create Preset’.
Name it as you wish.
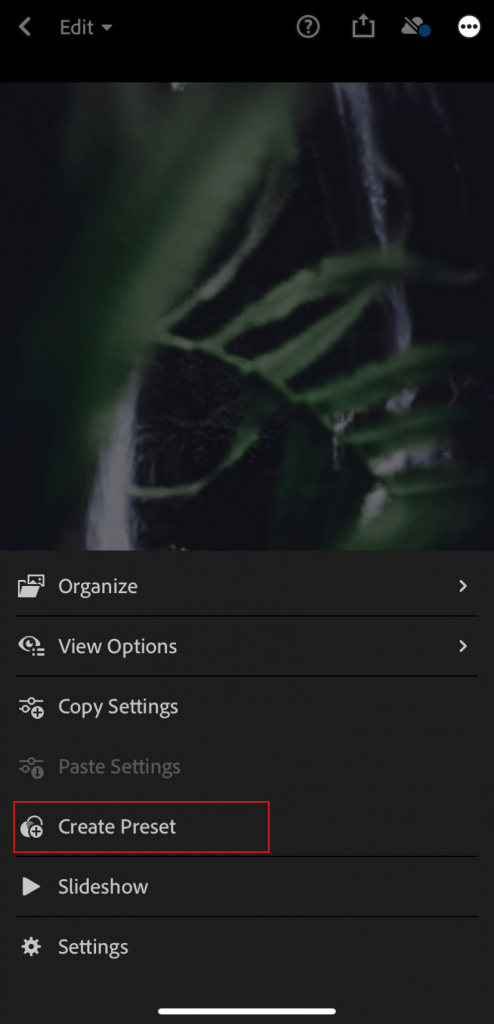
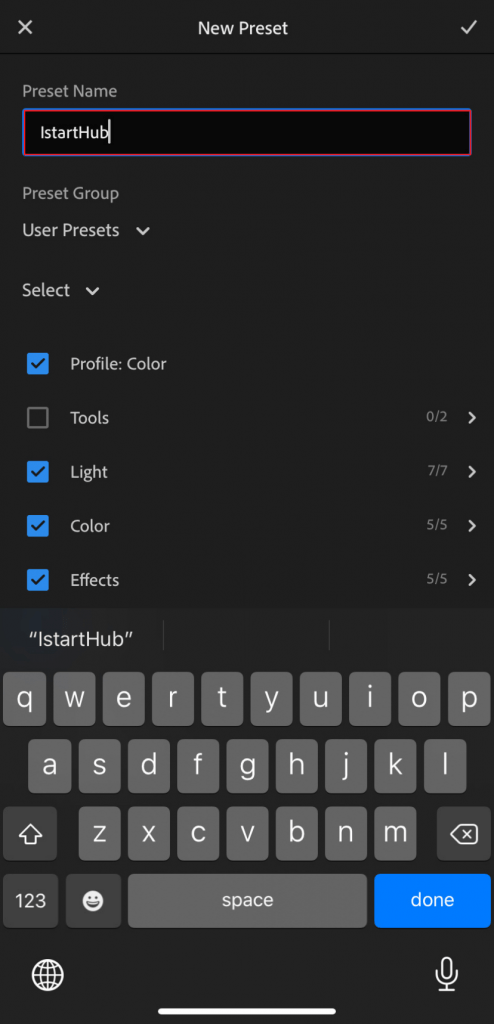
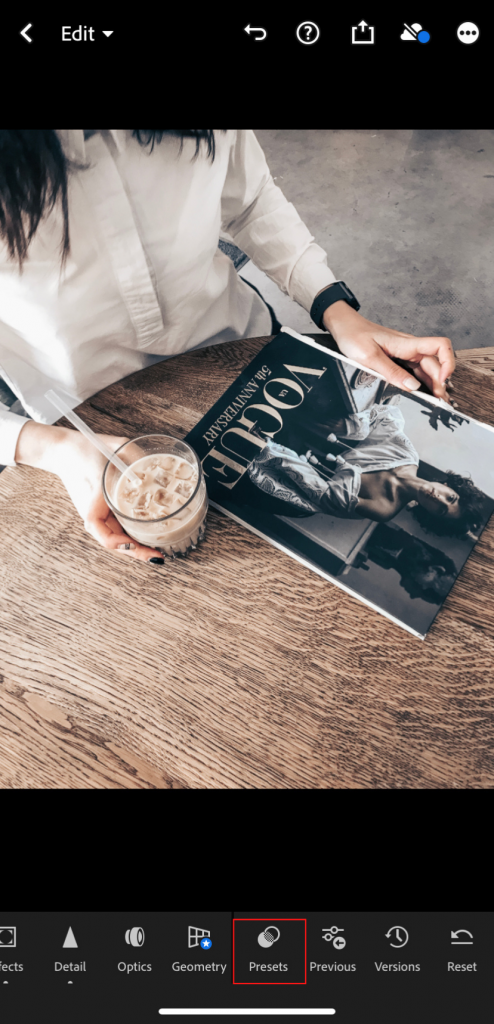
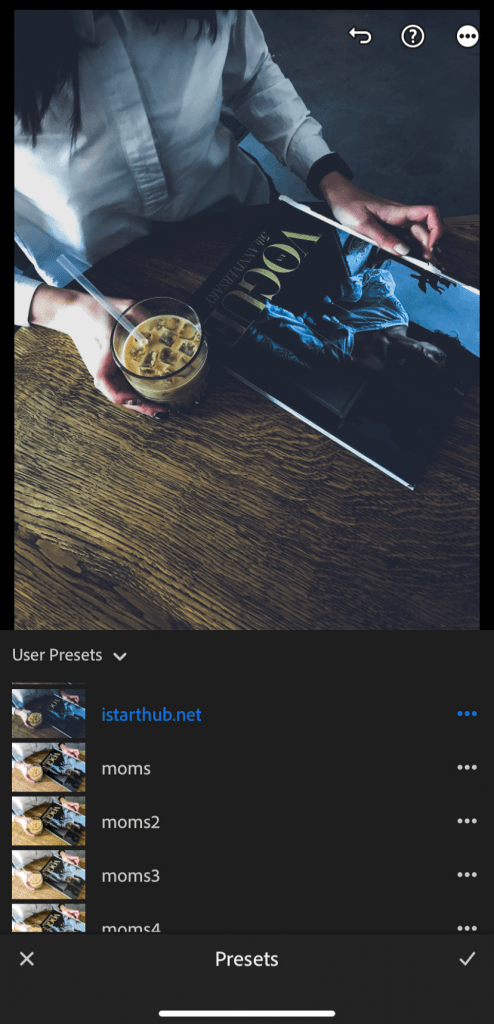
5. Navigate back to the main page and add your personal photo you would like to edit In the editing panel along the bottom of the photo, scroll to Presets.
Find the preset you’ve just created and click it.
I would recommend to install several presets at once and check which one is better for your feed. The success here depends on the colors of your pics, the light, and the effect you would like to get.
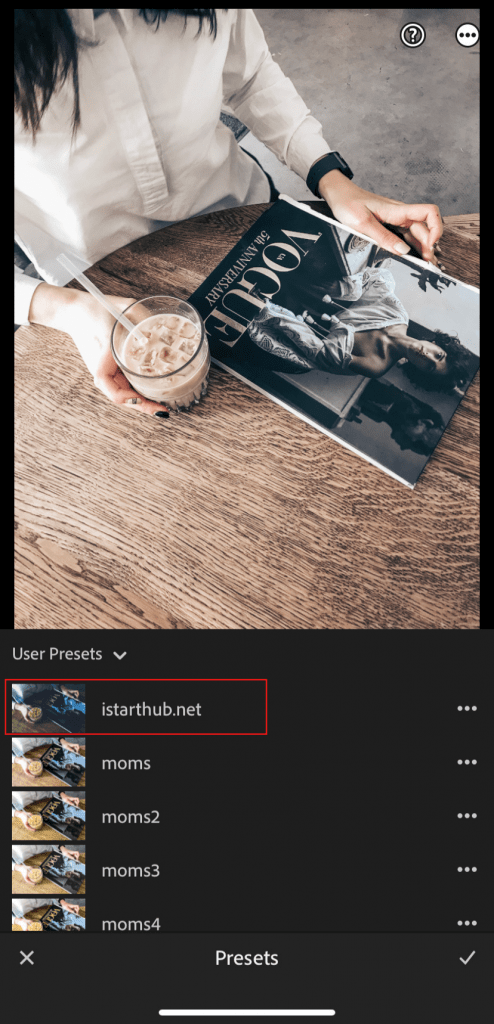
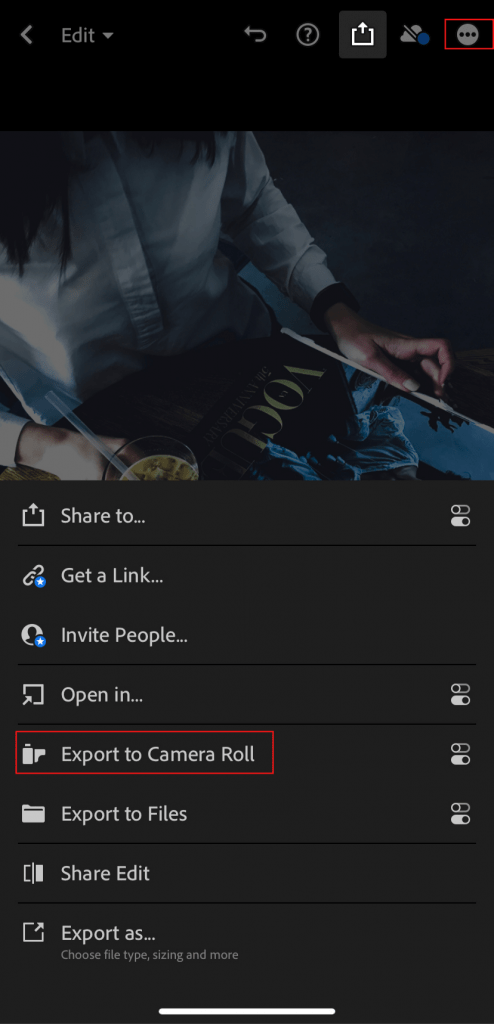
6. Export the photo to your device.
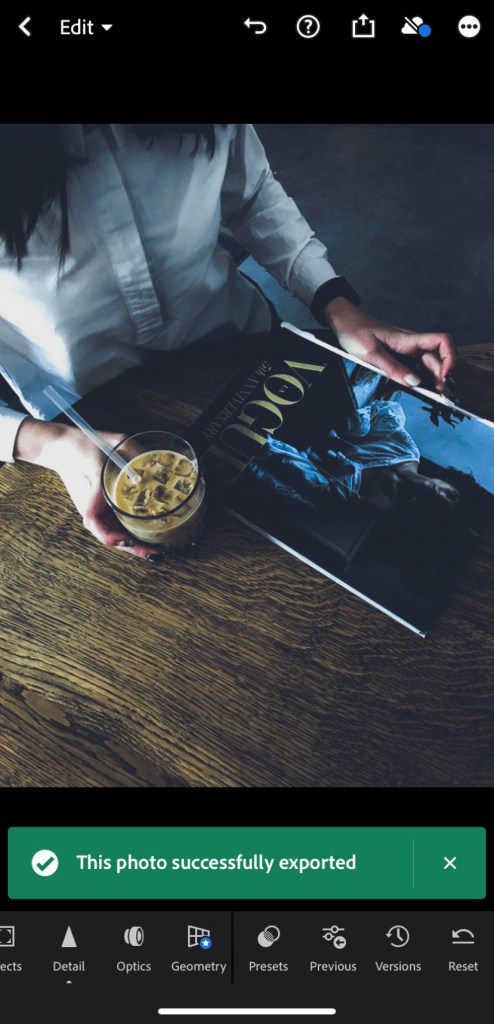
7. Enjoy it!
Finally, you learned how to install Lightroom presets on iPhone have got an opportunity to create a beautiful feed for free! Make sure to select the best preset to fit your blog theme in order to communicate with your audience visually.
Tetiana is a business coach and owner of IStartHub, a business media for ambitious female entrepreneurs and small business owners.


